Http Ana white com 2011 01 Shoe dresser
Difficulty
Advanced
| 
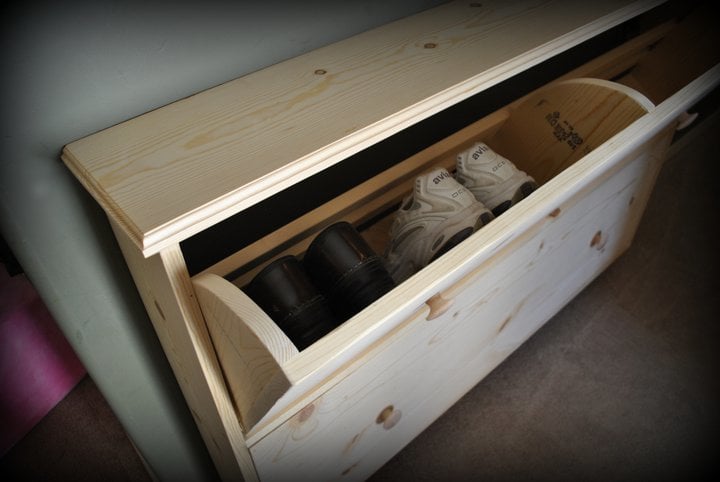
A narrow tilt out shoe storage unit that looks like a console table, acts like an entire shoe closet!
Special thanks to Niki for sharing her photo.
The boots are still there, but the shoes are gone.

It was indeed odd, seeing our Alaska entryway free of shoes and outfitted with a green dresser.

Mom, where are my Uggs? In the dresser, honey.

Hey, that's not a dresser!

That's a shoe bin!

Yes, this is a shoe bin. And these are the plans for it.

Someone once asked me: Why do women love shoes? I responded "because they always fit, and when nothing else does, your cute shoes will distract from your jeans not fitting." Have your dessert, and buy some cute shoes :) And build :)

Modern Mod
If your taste is more on the modern side, save yourself some knobs and cut handles out.

This shoe dresser is designed to work with tight hallways and tons of shoes.
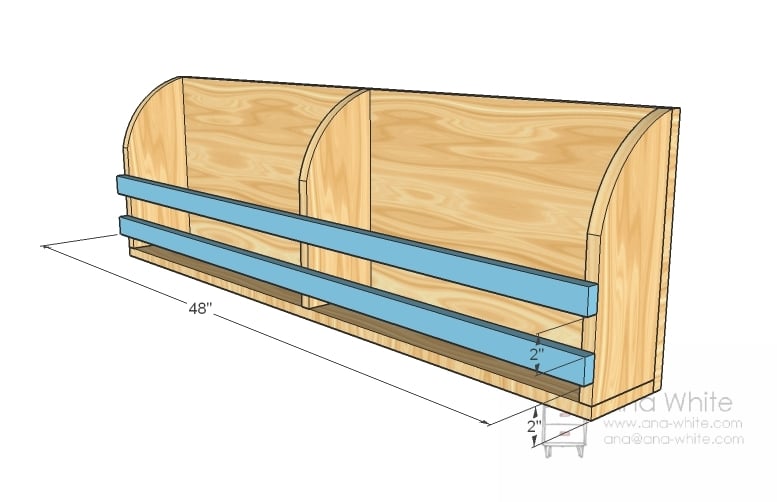
Dimensions
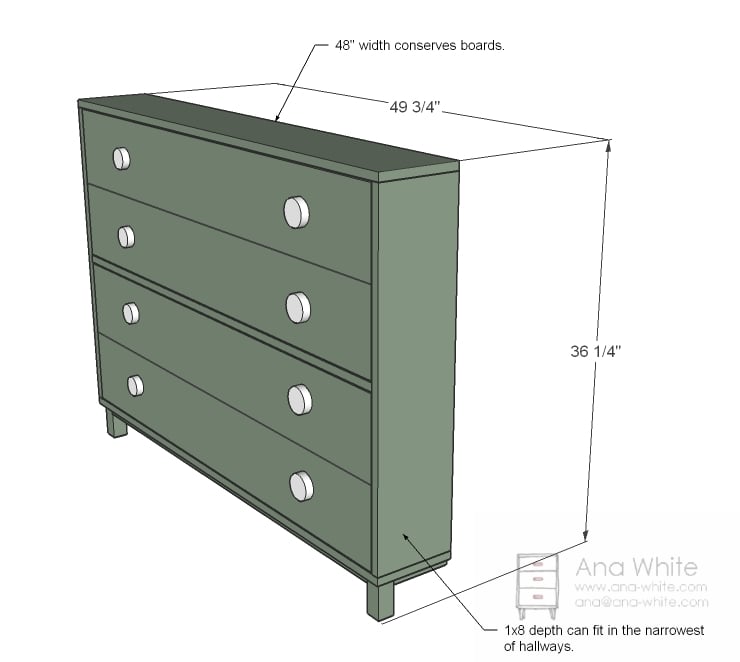
Dimensions are shown above.
Preparation
Shopping List
4 – 1×8, 8 foot length
2 – 1×6, 8 foot length
scrap 2x2s for the feet
3 – 1×2, 8 foot length
4 – 3/8″ wood dowel pins, 1 1/2″ long or two sets of traditional hinges
2″ screws or 1 1/4″ pocket hole screws
1 1/4″ Screws
2″ Finish nails
wood glue
4 magnetic cabinet clasps
knobs or pulls
A used fabric belt or strap
Finishing Supplies
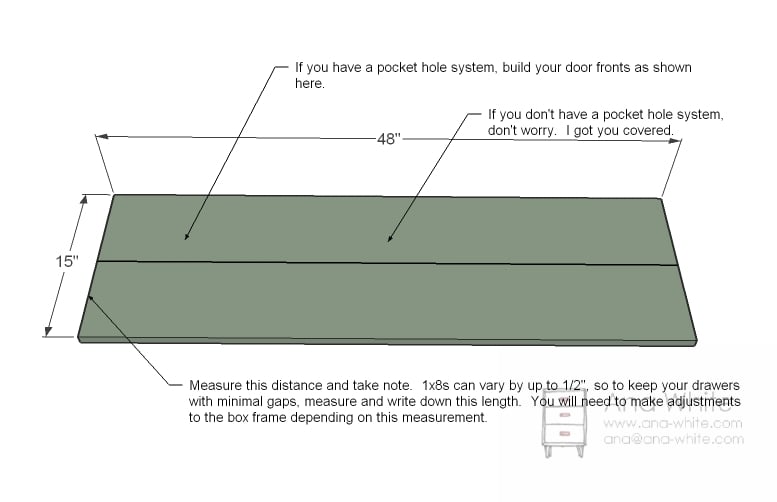
Cut List
4 – 1x8s @ 47″ Door Faces (measurements differ from diagrams to conserve boards)
1 – 1×8 @ 47 1/4″ Middle Shelf (measurements differ from diagram to conserve boards)
2 – 1x8s @ 48 3/4″ (Top and Bottom (measurements differ from diagram to conserve boards)
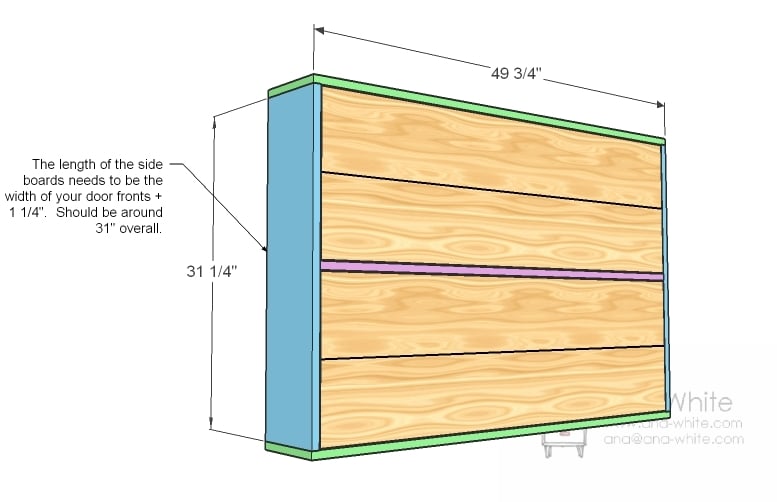
2 – 1x8s @ APPROXIMATELY 31″ (See step 2) Sides
2 – 1×6 @ 47″ (Bin Bottom) (measurement differs from diagram to conserve boards)
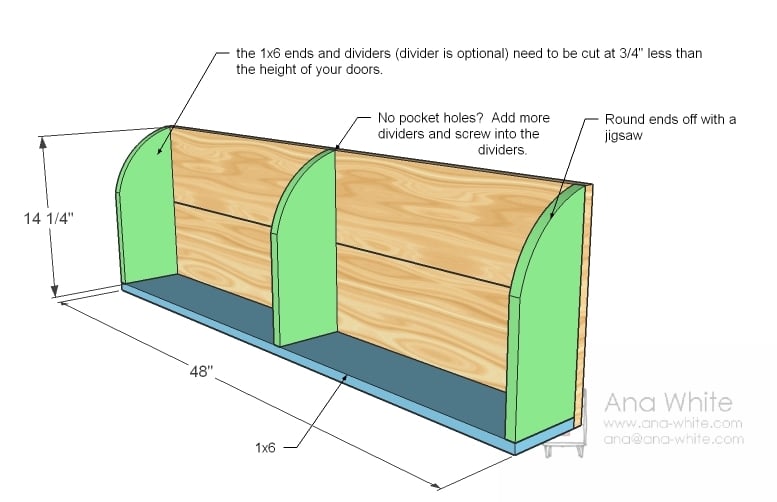
6 – 1×6 @ 14″ (Approximate)
4 – 1×2 @ 47″ (Bin Backs)
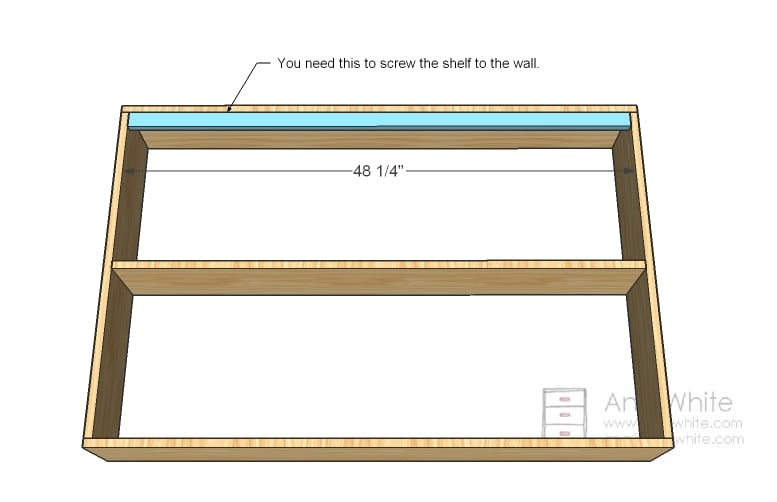
1 – 1×2 @ 47 1/4″ (Cleat)
2- 2×2 @ Your Base Board + 1″ (Legs)
1 – 1×2 @ 44 3/4″ (Front Apron)
2 – 1×2 @ 5″ (Side Aprons)

General Instructions
I have marked this one Advanced not because it is difficult to build, but because it could be easy to mess up. Please don't tackle this as a first project.
Instructions
Step 1
Door Faces
Cut your door faces. If you have a Kreg Jig™, attach door faces to make two doors. If not, that's okay, I got you covered in the next step. Measure the overall height of the doors and take note of this. 1x8s differ from mill to mill, so be aware and build according to your board widths.
Step 2
Bins
Start by attaching the 1×6 to the bottom of the doors as shown above with 2″ screws or pocket hole screws. Use glue. Then cut your bin dividers according to the height of your doors and round corners off. Attach in place. If you did not build your door faces in step 1, you can use finish nails and glue to attach the door faces to the dividers. You can use more dividers to add more support for the door faces (and more division of your shoe storage).
Step 3
Bin Backs
You need something to keep the shoes from tipping out. How about a couple of 1x2s? Screw and glue in place.
Step 4
Box
The box needs to be build around your bins, with a 1/8″ gap around the door faces. We've aleady accounted for the gaps on the sides of the doors, but not the top and bottom. As shown in the diagram, figure the exact measurement of the sides and cut. Build your box.
Step 5
Step 6
Dowels
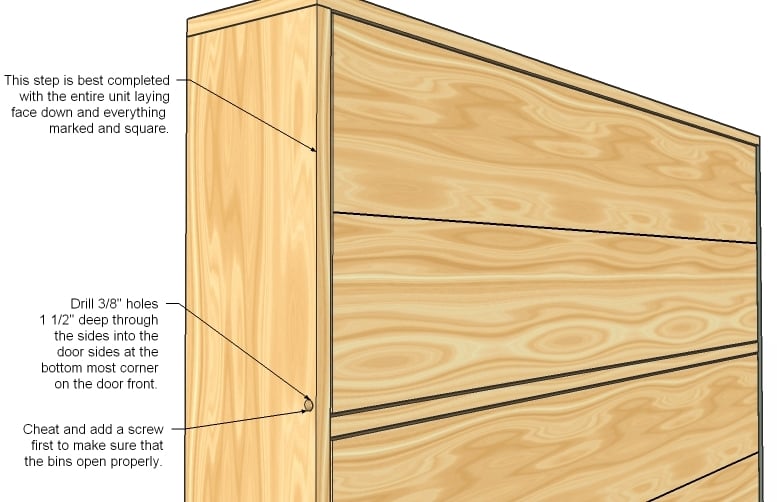
Now this is the tricky part. Not so much trick to do but trick for me to explain. Clamp the bins centered in their box, with a 1/8″ gap around all sides. If you don't have clamps, 1 1/4″ screws could do the trick from the inside of the bins. Drill a 3/8″ hole at the bottommost front corner of your bins, careful to make sure the hole drills into the bins and does not miss the bins. The hole needs to be the depth of your wood dowels. Insert the dowels and test the bins out. Alternatively, you can use traditional hinges.
Step 7
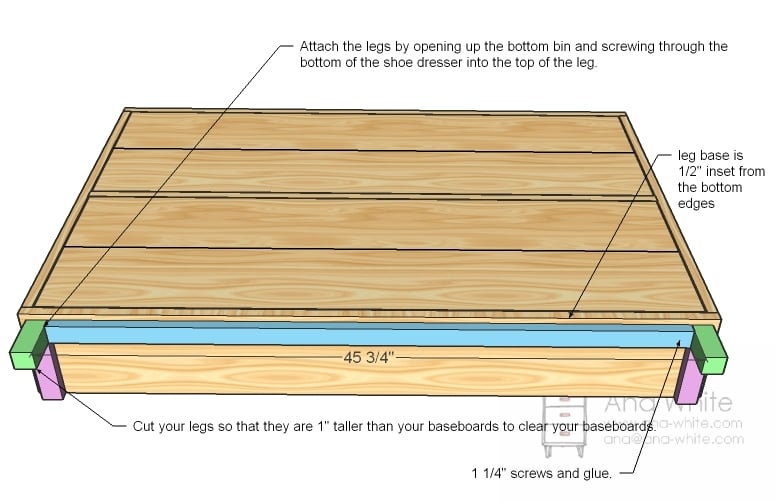
Footer
Attach the footer to the bottom as shown above.
Step 8
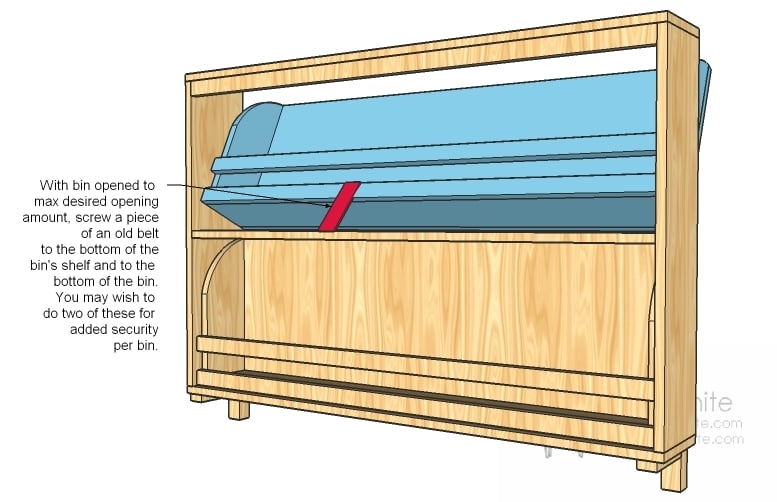
The Used Belt
Have someone give you a hand, because this one is tricky to handle here. There's only two front legs and the bins keep flopping open . . . I know Tilt the bin out to the desired max opening. Cut a piece of the belt to and screw it to the bin and the shelf below the bin. Make two straps per bin.
Step 9
Assembly
Keep the bins shut using the magnetic clasps. I used them on the sides for a nice tight fit. Screw the cleat to a stud in the wall behind the shoe dresser to keep it in place and to keep it from falling forward when the bins open.
lafaveshergoidold.blogspot.com
Source: https://www.ana-white.com/woodworking-projects/shoe-dresser
0 Response to "Http Ana white com 2011 01 Shoe dresser"
Post a Comment